

Crunchy on the outside and soft and cheesy inside- home-cooked cheese and arepas are a common staple of Latin American cuisine that you must not be missing. These delicious cornmeal cakes widely consumed in both Colombia as well as Venezuela can be made easy to make at home using only a handful of ingredients. If you prefer them filled with cheese that melts or with delicious fillings, arepas can be made in a variety of ways and are delicious.
Let’s begin by defining the basics of homemade cheese arepas
Cheese Arepas
What Are Arepas?
Arepas are flat, round cornmeal cakes which have been a popular food item in South America for centuries. Homemade Cheese Arepas are a result of indigenous communities from Colombia and Venezuela They are made with masarepa made of cornmeal, which is cooked in advance that gives them their distinctive texture. In contrast to breads and tortillas arepas feature a slightly crispy crust, with a softer warm inside they are perfect for filling with cheese, meats or even vegetables.
The simplest arepas require just three ingredients–cornmeal, water, and salt–but the addition of butter, oil, and cheese takes them to the next level. Homemade Cheese Arepas can be enjoyed as snacks or breakfast, or as an entire meal, arepas provide a warm and comforting meal that has a long-lasting effect on bringing people together over the course of generations.
The Popularity of homemade cheese arepas Around the World
In the past, homemade cheese arepas have been recognized worldwide. With the growth in popularity of Latin American restaurants and food trucks many people have fallen to these crisp delicious, creamy snacks. Within the United States, arepas can be found in cities that have huge Latin American communities, such as Miami, New York, and Los Angeles. Foodies everywhere are enjoying cooking their own at-home arepas and experimenting with various cheeses and fillings.
The wide variety of Homemade Cheese Arepas is a further reason to their increasing popularity. Some prefer them cooked and others prefer baking or frying them. The street sellers in Bogota to the kitchens of homes around the world cheese arepas have been popular and transcends boundaries.
If you love making delicious breakfast recipes from scratch, you might also enjoy trying this Mini Pancake Recipe for a quick and tasty morning treat.”
The Key Ingredients for Homemade Cheese Arepas
The Importance of Using Pre-Cooked Cornmeal (Masarepa)
The basis of any fantastic home-cooked cheese ispas is the correct type of cornmeal. Traditional arepas utilize masarepa prepared, a finely ground cornmeal which absorbs water with ease, resulting in a soft and flexible dough. In contrast to regular cornmeal that is hard and brittle, masarepa has been dried, cooked, and ground, which makes it the perfect basis for arepas.
Some of the most well-known brands include P.A.N., Goya as well as Harina Juana. It is possible to find masarepa in Latin American grocery stores or on the internet. It comes in yellow and white varieties However, either one will work in this recipe. Be sure to not substitute it with masa harina. Both can be used to make different meals like tortillas and Tamales.
Best Types of Cheese for Stuffed Arepas
Cheese is the primary component of home-cooked cheese and arepas And choosing the best cheese makes an enormous difference. The top cheeses that are perfect for arepas include:
- Mozzarella Soft flexible, stretchy, as well as melts perfectly.
- Queso Fresco – Crumbly that has a salty flavor.
- Queso Blanco Soft, creamy and mild in taste.
- Cheddar or Monterey Jack – Perfect for a richer, sharper taste.
To enhance the flavor, you could mix cheeses. You want a deliciously gooey-looking filling? Make use of a melting cheese such as mozzarella, paired with more robust cheeses like feta or cotija.
Other Key Ingredients: Salt, Water, and Butter
Above masarepa and cheese, a few easy ingredients will bring your arepas to life:
Salt – Increases the natural sweetness of corn.
water Softens the dough to give it the proper texture.
Butter or oil helps create a crisper crust that is golden brown when cooked.
Once you’ve figured out the ingredients that go to make an excellent arepa, we can look into making these by hand!
Arepas are a fantastic breakfast option, but if you’re in the mood for something different, check out this Healthy Breakfast Burrito Guide for a protein-packed start to your day.”
Step-by-Step to Homemade Cheese Arepas
Mixing the Dough: Finding the Right Consistency
The key to making firm, but soft fresh cheese and arepas is to get the right consistency for the dough. The steps to follow:
- A large dish mix two cups masarepa and 1/2 teaspoon salt.
- Gradually gradually add one and a half cups of water and stir it constantly using your hands or spoon.
- When the dough begins to form, it’s time to knead the dough for about 3-5 mins until it’s soft and slightly moist, but not sticky.
- Mix in one cup cheese that has been shredded to mix it until is well.
The ideal dough should be able to form itself but sturdy enough to keep its shape without breaking. If you feel it is too dry, you can add an extra splash of water. Are you finding it too sticky? You can add a bit of masarepa.
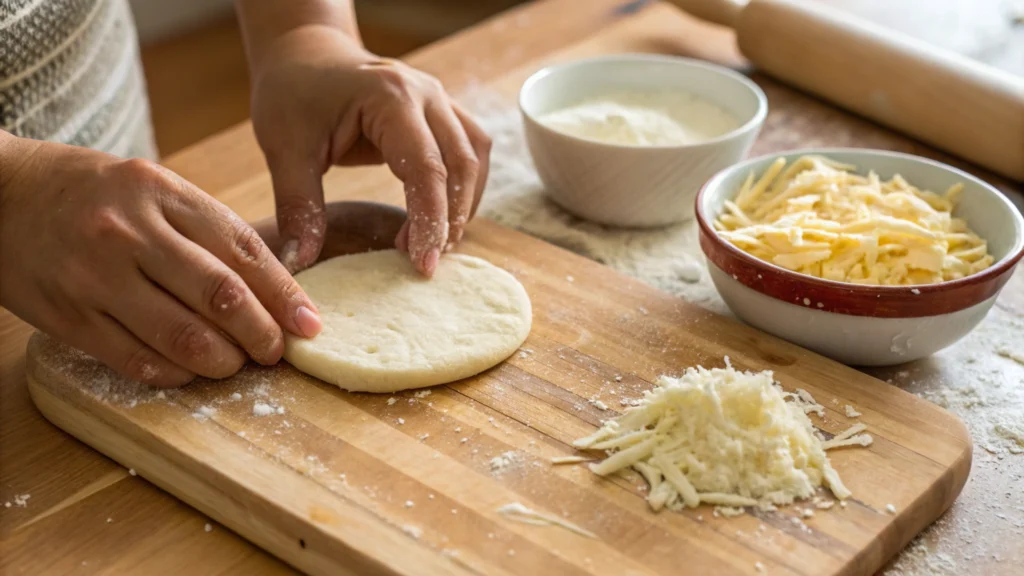
Shaping Your Arepas: Tips for Perfect Rounds
When your dough is done you can begin shaping the arepas.
- The dough should be divided into equally sized portions, roughly the size of the golf ball.
- Each piece is then rolled into a ball and smooth it out to form the shape of a half-inch thick disc.
- If you’re making cheese stuffed arepas, put a large amount of cheese in the middle of a disk.
- Put another disk on top of it, press the edges in a slack, then form into a round shape.
For a consistent shape Use your palms to move and rotate your arepa till it’s uniformly shape.
Cooking Techniques: Griddled vs. Baked Vs. Fried
There are a variety of ways to cook arepas and each recipe creates a distinct taste and texture:
Griddled Arepas (Traditional Method)
- Cook a cast-iron or nonstick skillet on moderate temperature.
- Lightly grease the pans with oils or butter and cook the arepas for 7 to 8 minutes on each side to golden brown.
Baked Arepas (Crispier Exterior)
- Preheat the oven until 350degF (175degC).
- Bake the arepas on a greased baking tray for 15 to 20 minutes and flipping them halfway through.
Fried Arepas (Crunchiest Option)
- Heat 1 millimeters of oil in a saucepan over medium-high temperature.
- Fry each ispa for 3-4 minutes on each side until crisp and golden.
Melting the Cheese Properly Without Burning the Dough
When you’re creating cheese-stuffed Arepas the filling you’re making to melt perfectly, without overcooking dough. For this to happen:
Cook over a low temperature to keep the cheese from burning prior to the cheese starts to melt.
If you’re using a more thicker arepa, you can cook it within the oven at 325°F (160degC) in 5 to 10 minutes.
Make sure to press lightly with a spatula as you cook to ensure an even heating.
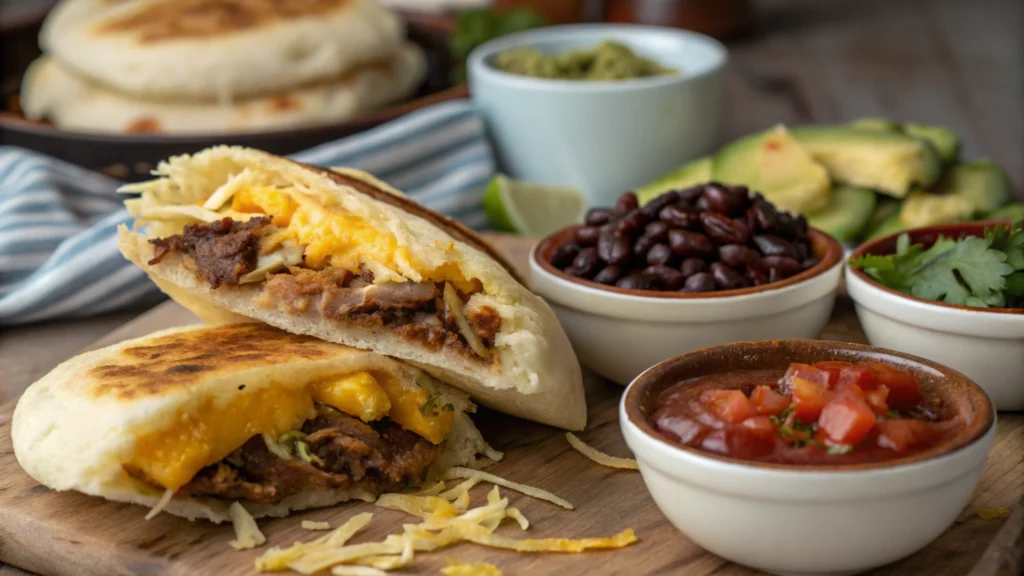
After cooking Once cooked, cook when you are done, serve your home-cooked cheese and arepas warm, with butter, or dip sauces such as guasacaca (Venezuelan avocado sauce) or salsa redada (pink sauce).
Colombian vs. Venezuelan Arepas What’s the difference?
Colombian Arepas: Simplicity and Cheese Integration
In contrast to their Venezuelan counterparts they are usually thinner and made from less ingredients, and are often served as a snack instead of a main dish. The most well-known version of Colombian arepas is to incorporate cheese in the pastry, which makes them naturally delicious and cheesy without fillers.
The most common kinds that are part of Colombian arepas comprise:
- Arepa de Queso is made using masarepa and cheese, typically griddled to golden brown.
- Arepa de Choclo – A sweeter and soft version that is made from fresh corn, and often decorated with cheese.
- Arepa Santandereana Arepa Santandereana A crunchier variation made from pork cracklings and yuca flour.
Colombian arepas are often eaten with cheese and butter or with traditional meals such as the ajiaco (chicken soup) or barbecued meats.
Venezuelan Arepas: Thicker and Used for Fillings
Venezuelan arepas tend to be more dense and are made to be cut open, then filled with different fillings. These arepas have a similar texture than sandwich bread with a crisp exterior layer that is soft and warm inside.
Some famous Venezuelan arepa fillings include:
- Reina Pepiada — A delicious avocado and chicken mix.
- Pelua Shredded beef and cheese.
- Domino Cheese and black beans.
The method of cooking is also different. Venezuelan arepas are typically baked, fried or grill and are able to stay in shape when cut open. They can be a meal by their own right, and are usually eaten as breakfast or lunch. They can also be eaten for dinner.
Which One is Better? A Matter of Personal Preference
Each of the Colombian as well as Venezuelan cheese arepas that are made at home each have their own distinct charm. If you’re looking for a simple cheese-infused and delicious arepa, opt with those from the Colombian version. If you enjoy playing with fillings in order to make your arepas a bit more hearty, Venezuelan arepas might be your preferred. In any case, both types are delicious and a satisfying way to savor these Latin American staple.
Tips and Tricks to perfect Arepas every time
How to Avoid Dry and Crumbly Dough
One of the biggest problems when creating home-cooked cheese ispas is the result of dry, crumbly dough. If your dough is not a good consistency it won’t stick together well and can break while making it. Here’s how you can repair it:
You can add more liquid slowly If your dough breaks when making, mix it in small quantities in warm water till it is soft and smooth.
Knead correctly – Knead the dough using your hands for at least 3 to 5 minutes in order to distribute moisture evenly.
Let the dough rest and let it rest for 5-10 minutes will help in letting the masarepa absorb all the water, and prevents dryness.
If you have accidentally added too much water, and your dough is sticky, sprinkle some masarepa to get it back to a proper consistency.
Preventing the Cheese from leaking out while cooking
Cheese arepas stuffed with cheese taste delicious however, if cheese is melting too fast the cheese can spill out and ignite. To prevent this from happening:
The edges should be sealed well Press the edges with a firm pressure to ensure that the filling remains in the.
Use a moderately-low temperature cooking at a lower temp allows that cheese to soften slowly as the dough forms an golden crust.
Chill prior to cooking Let your shapely arepas sit in the refrigerator for 10 minutes could make them more stable and hold their shape more effectively.
Getting the Perfect Crispy Exterior Without Overcooking the Inside
The most delicious home-cooked cheeses arepas come with a crisp golden crust and a soft, perfectly cooked inside. Here’s how to make them:
Make use of a heated griddle or pan start at medium-high heat and then alter the heat as required.
Slowly cook about 5-7 mins for each side is perfect.
Finish baking in the oven If your arepas have a thick texture bake them at 325 degF (160degC) within 5-10 minutes to make sure they’re cooked to perfection.
By following these guidelines you’ll be making restaurant quality arepas each time!
FAQ about Homemade Cheese Arepas
If you are making your own cheese and arepas You may have certain questions regarding ingredients or cooking methods and the various variations. Here are the answers to a few of the most frequent questions.
What Kind of Cheese is Best for Arepas?
The ideal cheese for Arepas is determined by the texture and flavor that you like. A few great options are:
Mozzarella melts beautifully and makes an elastic filling.
Queso Fresco – A crumbly cheese with a the taste of salty, mild.
Queso Blanco Soft and smooth, and perfect to stuff with.
Cheddar, or Monterey Jack – Ideal for a richer, more sharp flavor.
If you’re looking to create a creamy center, mix two cheeses. A mix of cheese and queso fresco gives you the perfect blend of flavor and stretch!
What is the Difference Between Venezuelan Arepas and Colombian Arepas?
Both varieties are delicious. Both versions of home-cooked cheese and arepas are scrumptious, but they do have some important differences:
Colombian Arepas Arepas from Colombia typically thinner, with cheese incorporated directly inside the bread dough. They are usually served as a dish to accompany a meal rather than being filled.
Venezuelan Arepas Arepas from Venezuela The arepas are thinner and designed to be cut open and filled with various fillings to make them an entire meal.
Overall, both styles are great, but it all depends on what you prefer to do with your arepas!
What is the Best Filling for Arepas?
Arepas are extremely versatile, and they can be filled with nearly everything! The most well-known fillings are:
The classic cheese-filled filling Simple and always delicious.
Shredded chicken or beef It adds the protein and flavor of a strong dish.
Avocado and black beans – A great vegetarian option.
Grilled plantains topped with cheese Sweet and delicious addition.
You can also play around with various sauces, such as salsa, guacamole and garlic butter to add more flavor.
Are Homemade Arepas Healthy?
Yes! Cheese arepas made at home are gluten-free and are made of cornmeal which is a rich source of complex carbohydrates and fiber. For a healthier version:
Make use of less cheese or select cheeses with low fat.
Bake or grill instead of cooking.
Include fresh vegetables or lean protein for a balanced diet.
Making small changes By making a few small changes, you can indulge in delicious arepas as a part of healthy eating habits!
Why You Should Try Making Homemade Cheese Arepas
The Joy of Making homemade cheese arepas
There are few things more satisfying than creating your own cheese ispas made from scratch. They can be enjoyed for breakfast, snack or even a full-on meal, they’re simple to prepare and are modified in a variety of ways. The combination of crisp golden crust and melty cheese is a treat!
One of the most appealing aspects regarding arepas is their ability to be used in a variety of ways. They can be served plain by adding cheese, or fill them with veggies and meats and even try sweet options. Additionally, because they’re gluten-free, they’re an excellent alternative for people with food restrictions.
Final Tips for Perfect homemade cheese arepas
Before you make Arepas at home, be sure to keep these important tips in mind:
Make sure you use the correct cornmeal The only cornmeal that is masarepa will give you the correct texture.
Do not work the dough too much It should be kneaded only enough to be easy and flexible.
Bake at the ideal temperature Medium heat will ensure crisp crusts without burning.
Play around with fillings from traditional to unique the possibilities are limitless!
Now that you’ve mastered making homemade cheese arepas, why not try another delicious breakfast classic like this Blueberry Banana Pancakes?

Homemade Cheese Arepas
Ingredients
Equipment
Method
- Prepare the Dough: In a large bowl, combine the masarepa and salt. Gradually add warm water while mixing with your hands or a spoon until the dough forms. Knead for 3-5 minutes until soft and pliable.
- Incorporate the Cheese: Mix in the shredded cheese evenly throughout the dough. Let the dough rest for 5 minutes.
- Shape the Arepas: Divide the dough into equal portions (about the size of a golf ball). Roll into a ball, then flatten into a round disc about ½-inch thick.
- Cook the Arepas: Heat a skillet or griddle over medium heat. Lightly grease with butter or oil. Cook each arepa for 7-8 minutes per side until golden brown and crispy.
- Optional – Melt the Cheese More: If your arepas are thicker, transfer them to a 325°F (160°C) oven for 5-10 minutes to ensure even cooking.
- Serve Warm: Enjoy as is, or slice open and fill with additional cheese, meats, or vegetables.
Notes
Cooking Variations: Instead of griddling, bake at 350°F (175°C) for 15-20 minutes or deep-fry for 3-4 minutes per side.
Storage: Store leftover arepas in an airtight container for up to 3 days and reheat on a griddle or in the oven.
Now, you’re ready to make authentic cheese arepas at home! Enjoy!